|
The cassette interface and (limited) sound generator use
the same hardware within the ULA. The tape system is very
reliable (unlike some…) and does not have a complicated
format. The reliability is due, as with all aspects of the
Spectrum, to attention to detail.
Tape Hardware
Pin 28 of the ULA is connected to both the MIC (for sending
data to the cassette) and the EAR (for sending data from the
cassette). This pin corresponds to port address 254.
Writing to port 254 sets the cassette line MIC depending on
the state of bit 3. If 0 then the output voltage is 0.75V,
if 1 then the output voltage is 1.3. By alternating setting
bit 3 a square wave can be sent to the cassette. This square
wave is recorded as an audio tone with a fixed volume and
a frequency that depends on the time that bit 3 remains constant.
It is the time between the changes in signal level that is
used to retrieve the data recorded on tape.
Tape Format
Tape files are recorded as two blocks of information, the
Header and the Data. The header is a short burst of audio
tone used to store information concerning the data stored
in the data block. Although described later, this block effectively
contains the name of the file and the number of bytes in the
data block.
Each type of block begins with a leader tone about of about
5 seconds for a header block and 2 seconds for a data block.
Leader tone is a square wave with 619.4 pica-seconds between
each change of state, corresponding to a frequency of about
807Hz. A shorter sync pulse marks the end of the leader tone,
low for 190.6 pica-seconds and high for 210 pica-seconds.
The length of a data pulse depends on whether it represents
a 0 or 1. Zero is represented by a low of 244.3 pica-seconds
and a high of 244.3 pica-seconds. A 1 is twice this.
The header contains about 19 bytes of data, 17 of which are
supplied by the user. The format is as follows:
Type * 1 byte| File Name *10 bytes | length * 2 bytes | start
line/addr * 2 bytes | prog. Length * 2 bytes
The type byte is 0 for BASIC program, 1 for Numeric array,
2 for String array, 3 for machine code or screen dump. Length
determines the size of the data block that follows.
Start line/addr is determined by the type. If BASIC then
it represents the line number for an auto start program. If
an array then it holds the name of the array (first byte only).
If machine code, it contains the start address to load data
from. Prog. Length is determined by the type. If BASIC then
it represents the size of the visual basic program (not the
data area). If an array or machine code then it is not used.
The data block contains two more bytes than the length recorded
above - the leading type byte and the trailing parity byte.
When a file is being saved, each byte written to the header/data
block is XOR'ed with the parity byte. The parity byte's initial
value is given by the flag byte. When read, the data should
produce a 0 if generated the same way.
SAVE/LOAD ROM Routines
The save routine starts at address 1218 (04C2 Hex). The save
mode is determined by the registers. DE represents the number
of data bytes to save, IX represents the address of the first
data byte and A represents type data type (0 for a header,
255 for a data block).
This routine simply writes memory to tape without prompts.
This means that the save routine needs to be called twice
- once for the 17 byte header and another for the data.
The load routine starts at 1366 (0556 Hex). The same registers
are used but for the number of bytes to be loaded, the address
to place the first byte and the type (header/data). If the
carry flag is reset, the data will not be loaded into memory,
but instead compared to what already exists, i.e. a VERIFY.
Note that no motor control commands are available so on-demand
loading is difficult. The following program will read a tape
header and produce a catalogue in the print buffer area.
LOOP LD DE,17 ;Length of header (always 17 bytes)
XOR A ;Clear A (to mean load header)
SCF ;set carry flag (to load data rather than verify)
LD IX,23311 ;Start of data area to load data into
CALL 1366 ;Load routine
JR NC, LOOP ;if not header, repeat program
RET ;stop
PEEK 23311 will return the type
PRINT CHR$(PEEK(23311+I)) will print the file name if I is
within a for loop of 1 to 10.
Sound
The small loudspeaker that produces the sound is connected
to the same output pin of the ULA as EAR and MIC. The only
difference is that the output is controlled by bit 4 of port
254. If bit 4 is 0 then the voltage is 0.75V and 3.3V when
1. The higher 3.3V is used because the lower voltage used
by the tape system is insufficient to drive the loudspeaker.
The basic method of making a sound is identical to the method
used to generate tones for the tape system. The volume is
fixed by the range of voltages corresponding to the two state
square wave, and the sound quality set by the shape of the
wave form. In fact, the simple BASIC BEEP command does a lot
to convey an accurate musical scale.
The following program:
10 OUT 254, 16
20 OUT 254, 0
30 GOTO 10
Constantly changes bit 4 (sound) from 0 to 1 continuously.
The rough, low pitched sound is due to the lack of speed of
BASIC. The black background is due to bits 0,1,2 being 0 (background
colour, remember?). The following assembly program drives
the I/O port directly using a table of values as the data:
LD B,count
LD HL,(table)
LOOP LD A,(HL)
OR 8
OUT (254),A
LD C,time
DEL DEC C
JP NZ DEL
INC HL
DEC B
JP NZ LOOP
RET
DEFW table
Where 'time' is the pitch and 'table' is the address to find
the next data item. To produce white noise (which is a roughly
equal mixture of a very wide range of frequencies), set the
pitch to 128 and 'table' to 200 which is a ROM address and
will produce random(ish) numbers. Write a simple BASIC program
to poke these values and repeatedly call the routine.
ZX Printer
The ZX Printer is a cheap and cheerful printer with its only
shortcomings being its inaccuracy of dot positioning and the
quality of the paper and output. Just minor points though,
for what was a cheap and adequate solution.
The printer is a thermal device and works by evaporating the
aluminium coating from the roll of paper. The printer uses
a spark produced by two travelling metal points, or styli,
to evaporate the aluminium. Do this is the dark and you can
see the blue sparks below the tear bar.
The ZX printer drivers are complete and show an interesting
example of the way computers can control hardware devices.
Read on for exciting novel applications. Not.
The printer is connected to port 251. Reading the port provides
status information.
When reading:
Bit 0: See below
Bit 6: 0 if the printer is connected
Bit 7: Position of the styli - 0 if any are positioned over
paper
When writing:
Bit 1: If 0 then motor runs fast, if 1 then slower speed
Bit 2: If 0 the motor starts, 1 it stops
Bit 7: 1 for a spark, 0 for no spark (i.e. burn a black dot)
The speed of the styli varies depending on the loading of
the motor. To overcome this difficulty, an encoder disc is
attached to the motor. This causes bit 0 to pulse around 256
times as a stylus scans a line. Thus if the production of
dots is tied to the pulsing of bit 0, the dots will be evenly
spaced no matter what the speed of the motor.
The slower speed (bit 2) is used to print the last two scan
lines so that the styli can be stopped off the paper, ready
to print the first line the next time the printer is used.
The stylus voltage must be switched off to detect the edge
of the paper. This is because the presence of the stylus voltage
sets bit 7 and bits 0 and 7 are latched (held steady until
instructed) until data is written to the I/O port. This means
that to obtain refreshed data from bits 0 and 7 data has to
be written to the port.
Because of the speed requirements, BASIC cannot be used to
control this information. The following pseudo assembly produces
a row of 256 dots.
LD A,0
OUT 251,A ;start motor running
Paper IN A,251 ;get printer status
RL A ;rotate one bit left…
JP M, noprint ;test for printer
JP NC, paper ;test for stylus on paper
Encode IN A,251 ;read …
RR A ;encoder bit
LDA, (x)
OUT 251,A ;to print paper (x=0)/ink (x=128) dot
|
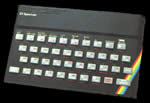 48k Spectrum